Sunday, November 3, 2013

A Beautiful Basket Case-Upcycling Thrift Store Baskets

To keep up with more ideas for the holidays, I found this thrift store basket that is uniquely shaped. Perfect for a catch all for yarn, toys or even magazines. So why not spruce it up for that special someone?

It was a great basket, large enough to use for many purposes, although somewhat drab. With the colder weather coming on I wanted to add a little outdoor flavor to bring the outside, inside.


And even better was the price, another .09 find!


I first took white latex paint and dry brushed the outside. By dry brushing you only want to put a little paint on your brush and then spread it as far as you can. The purpose is for the paint to not cover your project completely. This gives a weathered look to your piece.


Next I taped off the bamboo pieces and covered the bottom. I spray painted the top and handles with black spray paint and let dry. Then recoated with a second coat.


After everything is dry, remove your tape and then apply a wood conditioner or another secret soy sauce to enhance the old bamboo.


I wanted to bring a little bit of the outdoors, indoors. I found some leaves (which are readily available right not lol) and sprayed adhesive in a can on them and placed them on the outside of the basket. Then took Mod Podge and applied several coats to seal them so they look the same over time.


  • Thrift Store Basket                  $.09
  • Mod Podge (on hand)               $.00

------------------------------------------------------------------------------------------------------------------

  • TOTAL OF TODAY’S PROJECT      $.09


Congratulations to Katy Hancock winner of the Wired Turquoise Ring Giveaway! Remember to bookmark us and follow us on http://www.facebook.com/Junkin4Humanity and our website http://junkin4humanity.com for more giveaways!

Saturday, November 2, 2013

Creative Chalkboard For The Holidays

Here is a cute idea for a gift for the person who loves shabby chic, or just likes to stay organized. Instead of buying that expensive chalkboard or the even more, expensive chalkboard that you find at your neighborhood craft store, why not make one? 
I found this cute wood display at the thrift store and loved its "bones", so I decided I would make it into a chalkboard that I have been meaning to make for my kitchen.


What a deal .09!!


Directions

  1. I started out by sanding it down first.
  2. Then painted it with a black spray paint to give it some aesthetic texture for the final result. 
  3. After drying I painted it with a white wash; 2 parts paint with 1 part water.
  4. Removed the backboard and painted with chalkboard paint.
  5. While chalkboard is drying, I sanded the white frame for a distressed look and then applied liquid black antiquing. (remember a little goes a long way of this stuff.)
  6. I then reapplied the chalkboard to the back of the frame.
  7. Add any type of hardware, design, or stenciling.
  8. Where the gap was, I added a piece of brass that use to be on an old vintage window and cut to fit. Giving it more flair as well as covering the gap.
There you have it!! A Custom Made Chalkboard for a fraction of store prices. Even if you were to give as a gift, no one will ever know that you spent next to nothing. All they will see is all the love that went into a custom gift just for them.

After I made this, the next morning my wonderful guy left me my first note to wake up to. He really is the best!


  • Thrift Store Wood Display                       $.09
  • Chalkboard and Paint (on hand)               $.00

------------------------------------------------------------------------------------------------------------------

  • TOTAL OF TODAY’S PROJECT                   $.09


Tuesday, October 29, 2013

Holiday Gifts Under $5

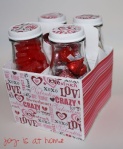
decorated cardboard and sweets

Reuse cardboard drink carriers and empty bottles to make a cute gift for sweet and salty treats


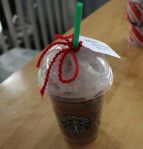
starbucks
Ask The Barista for a clean cup and lid. Stuff with brown and white tissue. Slide Starbucks gift card inside


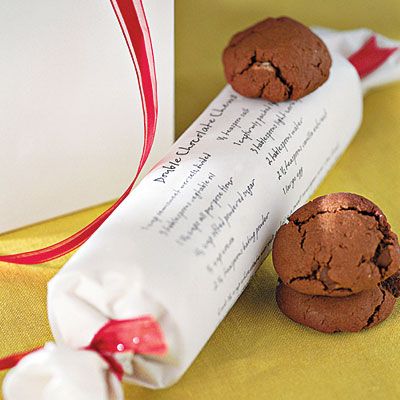
cookie recipe


Wrap frozen homemade cookie dough in parchment, print out recipe on white paper, and wrap


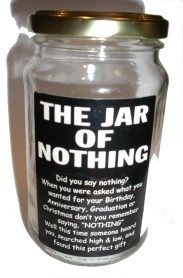
jar of nothing

Did you say nothing? When you were asked what you wanted for Birthday, Anniversary, Graduation or Christmas. Don't you remember saying NOTHING Well this time someone heard you, searched high and low and found this perfect gift for you.


Buy a couple really of pretty bars of  soap it's so pretty you won't need  gift wrap


Make Magnets from Bottled Starbucks Frappuccino


herb pots
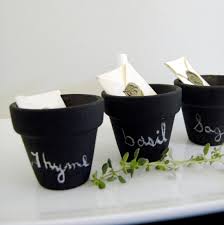
Pick up a couple packets of seeds that are suitable for a windowsill garden – chives, cilantro or basil, perhaps – some small pots and soil for an inexpensive gift that will keep giving all year.


Give the gift of snuggly warmth in the form of a nice, thick pair of socks. For the best deal, buy a multi-pack; and divide it among several people on your gift list.


Most grocery stores – and many big-box stores – now sell reusable shopping bags for 99-cents a bag. Pick up five of them for the perfect eco-chic gift. Or put your gift inside for a bag they won't have to throw away.

recipe in a jar


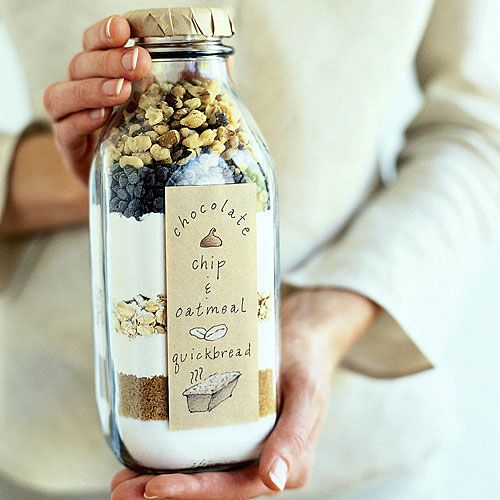
Put ingredients for a recipe in a Decorative Jar.


Monday, October 28, 2013

Tonight's Blog is a Poll

We want to know what you want!

Please take a moment just to check a box and let us know, we value your feedback.
Junkin4Humanity wants to know what you would like to see in our blog for the upcoming holiday season?
  
pollcode.com free polls 

Sunday, October 27, 2013

Salt Dough Ornaments For The Holidays

Spending Quality Time With Family

Whether money is tight during the holidays or you just want a new craft to do with your kids? Salt Dough Ornaments are the best thing to do either. Made from things you already have in your cabinet, you can make special keepsakes with this recipe from Halloween pumpkins, to thanksgiving decorations and even Christmas ornaments.  Nothing is more special than making a homemade memories, spending time with your family and keeping your keepsakes for years to come.


 Directions for Salt Dough Recipe

Ingredients 3/4 Cup of Shortening 3/4 Cup of Sugar 1/4 Cup of Brown Sugar 1/2 Cup of Molasses 3 Cups of Flour 1 TBSP Cinnamon 1/2 TSP Salt 1/2 Cup to 1 Cup of Water (more or less) Directions Cream together the Shortening and the Sugars in a large mixing bowl until mixed well. Stir in the Molasses, again until mixed well. In separate bowl, combine the Flour, Cinnamon, and Salt and stir to combine. Begin to alternately add your dry ingredients to the wet mixture. Add the flour mixture and 1/4 cup of the water at a time until ingredients are mixed and you have formed a good dough. At some point, it's best to just get your hands in there and start mixing, as it will quickly become a challenge to stir with a spoon! You may need to add a little more water or flour to get your dough to the correct consistency. You want to be able to touch the dough with your finger and have it not stick to it. So when that happens, it's ready. Shape your dough into a large ball. Cover it with plastic wrap and set in the refrigerator for 20-30 minutes. If you plan to be using your dough for cut-out ornies (using cookie cutters, etc), what I like to do is sprinkle my counter with cinnamon. This helps the dough to not stick, but it also adds extra cinnamon to the outer layer of the dough, which I like. But this is totally optional. I also suggest you buy your cinnamon in large bulk containers; it's much cheaper that way...and get the cheapest cinnamon you can find. No sense spending a lot of money on something you aren't going to eat! For cut-outs and small ornies (like the cinnamon bun ornies), bake these at 350° for for 15-20 minutes. It may be more or less, depending on your own oven. They will harden quite a bit while cooling. Just be sure they're cooked through and let them cool completely. For larger items like pantry cakes or very large cinnamon buns (I've done full size ones on occasion), I usually bake them at 325° for 20-30 minutes, again, oven times will vary, and the thickness of your item will be a big factor too. And if you're going to dip your ornies or other baked dough items in wax, just make sure they are cooled completely before doing so.

Saturday, October 26, 2013

Primitive Wreath Made from old Maps

The primitive look is quite the rage for many crafters as well as home decorators. It is not just a fad, its a way of life. It is a decorating style that is simplistic, giving a feeling of warmth to a home. I love it because, it is a way to come in from the world into your own private space that quietly whispers a "welcome home" and tranquility to it.

One of my favorite things is old maps, atlases and globes. I always snatch them up when I'm thrift shopping. Since I had so many on hand, I thought I would make a wreath from them.


I got this wreath for .69


Removed the flowers


I then took an old book filled with maps I got for .25 and cut the maps into leaf shapes.
Then measured them out by laying them around the wreath. These leaves I wanted to fit the contour of the wreath itself. I then took the map leaves and soaked them in coffee to give more of a vintage look. Then laid them on the wreath to dry and fit to the contour of the wreath.


For the map leaves that would be stemming from the wreath, I also soaked them in the 
coffee mixture. Then laid them out in an egg carton to allow them to dry to a wrinkled look.


After they were dry, I alternated them with the ones I allowed to dry on the wreath and hot glued them.


I then added ribbon to the wreath. This one I made a rose out of the 
ribbon and hot glued it to the wreath to stay in place. If you need 
help on making a ribbon rose Factory Direct Craft has a good illustration.


  • wreath                    $  .49
  • ribbon                     $1.97
  • Old Atlas Book         $ .25
  • --------------------------------------------
Total Of Today's Project   $2. 71